36 degrees outside. That's cold by the standards of Houston. So I plug in my drywall lamp in the garage. That thing will heat up my garage pretty quick. Turn on my favorite jazz station on the radio, I am ready to tackle today’s agenda, changing rear break pads.
It took me a little over one hour to complete the break job. It was my first time on SV650, but I have done many disk brake jobs before, i knew what was expected.
You will need,
- Metric sockets and wrenches
- New pads I bought a set of Ferodo for $25 from a local Suzuki dealer. Made in Italy…. oooooooo……....

- Medium grit sand paper
- Screw driver set
- Needle nose pliers
- Wire hanger (or wife’s hands or your kid’s hands)
- Break parts cleaner spray
I put the bike on the rear stand, because I also had to adjust, clean and lube the chain. But I guess you don’t have to put it on the stand if you don’t have one for changing pads.
1. Take the side cover off. I still only have the left side. My right side cover is missing. If anyone has one to get rid of, let me know.
2. Take the front and rear seat off.
3. Take the rear passenger grab bar off.
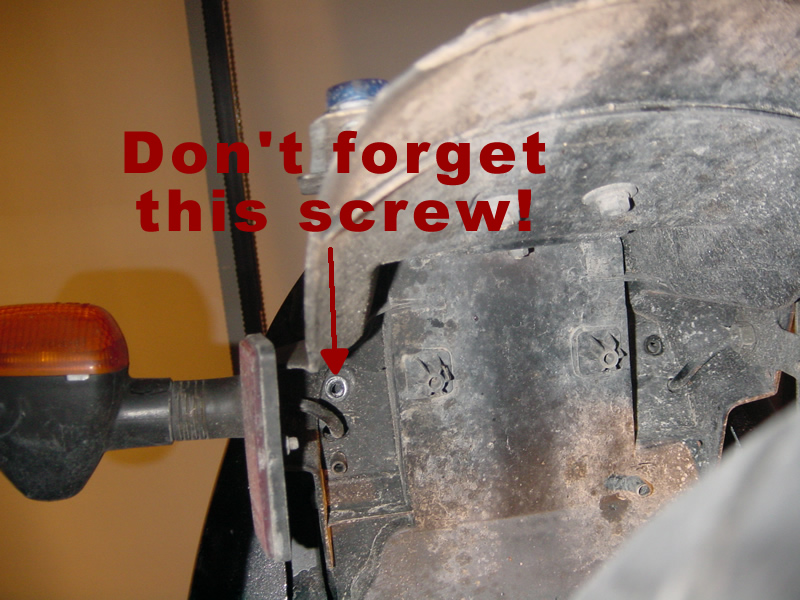
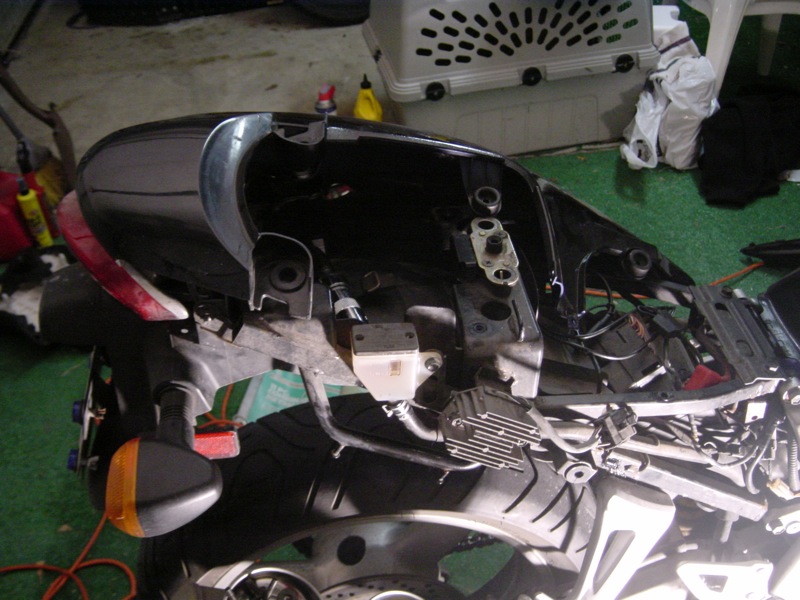
4. Take off the rear plastic body parts off. Since I wasn't looking at a service manual, I didn't know where the hidden screws were and where the body snaps were located. Look at the following pictures for some clues.


5. Take two phillips screws off the top of the rear break reservoir. Pop the cover and leave it rested there. Make sure that excess break fluid can back up in there.

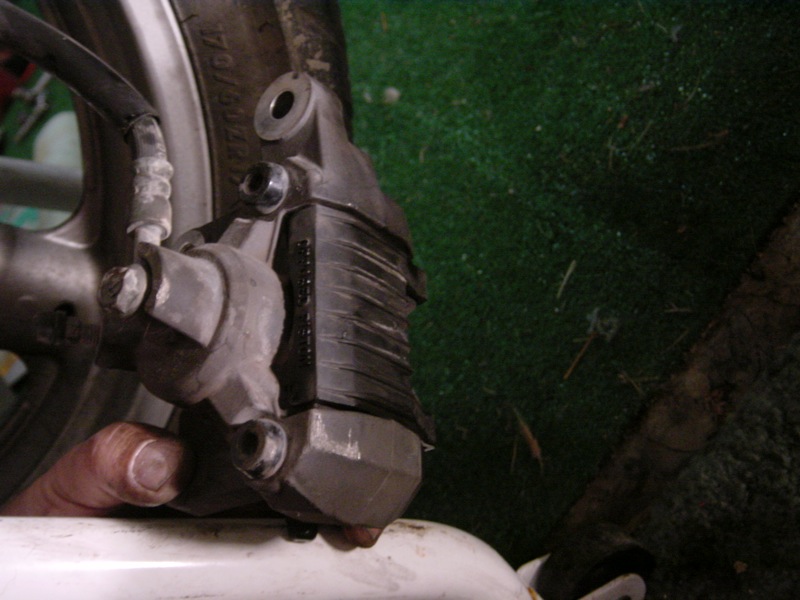
6. Take the bolt off from the torque link comp bar. Just the one on the rear break side. 14 mm socket up front, the nut, and I had to use the 14mm wrench to hold the screw head in the back.

7. Next take the bolt out of the caliper, 12mm.
8. Slide the caliper off. Use the coat hanger to hand the caliper if you need to, not damaging the break line hose.
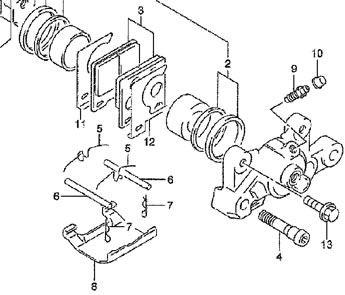
9. Take the plastic cover off. You might need a flat head screw driver to pop it off. (#8 on the parts list)


10. Look REALLY CAREFULLY. REMEMBER HOW EVERYTHING IS PUT TOGETHER, BECAUSE YOU HAVE TO PUT THEM BACK TOGETHER! If you need to, take some pictures.

11. Take the out holder pins that holding the break pad pins. I used needle nose for this. (#7 on the parts list)
12. Take the break pad pins out. I used a needle nose to get them out. (#6 on the parts list)
13. Shims, pads, springs, all should now come out.
14. Spray the caliper and shims with the cleaner.
15. Put the old pad back in and with a screw driver, rock it back and force to push the break pistons back all the way. Pay attention to the rear break reservoir. The break fluid will more than likely overflow. Once the pistons are all the way back, take the old pads out.
16. With the sand paper, clean up the grimes built up on the break pad pins. This will make the procedure, much easier.
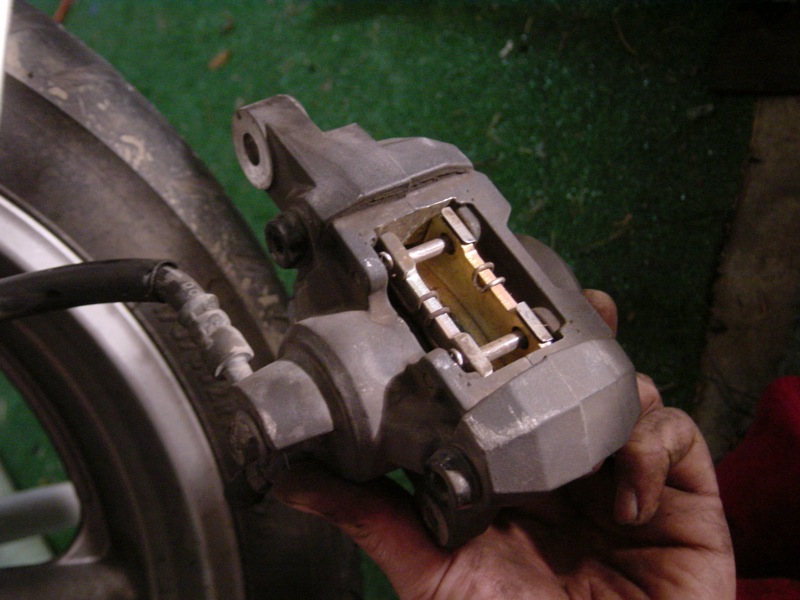
17. Put the shims and pads together and slide them into the caliper.
18. Slide one pin in. Line up the holder pin hole so that you can put the holder pin in later.
19. Place the springs but hooking the one end under the pin you just put in.
20. Now the most difficult part. With a small flat head screw driver and the other break pad pin in your hand, hold the unhooked end of the spring down with the screw driver and put the pin through the hole. Making sure that spring get placed under the pin to create tension to hold the pads in. Do this one spring at the time.
21. Place the holder pins.
22. Spray the caliper and pads really good with the cleaner. You don’t want any hand grease left on the pads.
23. Beverage break!
24. Now all you have to do is to reverse the steps and put them all back together.
25. For the bolts to hold the calipers and the torque bar, put thread lock on it. You don’t want them coming lose on the highway!
That's it! For more pictures, go to my Flickr SV650S album.
Oh, and why am I changing the oil and filter at 9925?
Well, the guy I bought the bike from said that the bike was on the schedule, but I just didn't feel safe........ Now I know I am good for another 3000 miles or so.
It took me a little over one hour to complete the break job. It was my first time on SV650, but I have done many disk brake jobs before, i knew what was expected.
You will need,
- Metric sockets and wrenches
- New pads I bought a set of Ferodo for $25 from a local Suzuki dealer. Made in Italy…. oooooooo……....

- Medium grit sand paper
- Screw driver set
- Needle nose pliers
- Wire hanger (or wife’s hands or your kid’s hands)
- Break parts cleaner spray
I put the bike on the rear stand, because I also had to adjust, clean and lube the chain. But I guess you don’t have to put it on the stand if you don’t have one for changing pads.
1. Take the side cover off. I still only have the left side. My right side cover is missing. If anyone has one to get rid of, let me know.
2. Take the front and rear seat off.
3. Take the rear passenger grab bar off.
4. Take off the rear plastic body parts off. Since I wasn't looking at a service manual, I didn't know where the hidden screws were and where the body snaps were located. Look at the following pictures for some clues.
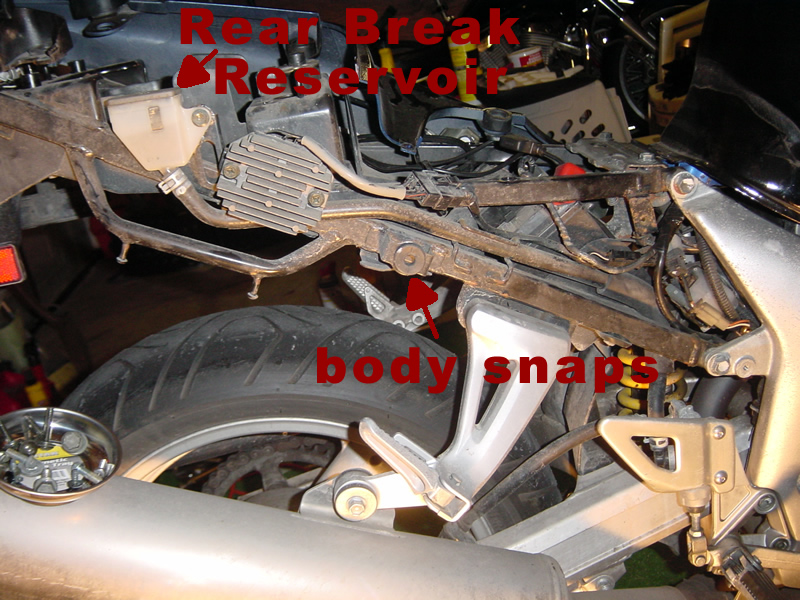
5. Take two phillips screws off the top of the rear break reservoir. Pop the cover and leave it rested there. Make sure that excess break fluid can back up in there.
6. Take the bolt off from the torque link comp bar. Just the one on the rear break side. 14 mm socket up front, the nut, and I had to use the 14mm wrench to hold the screw head in the back.
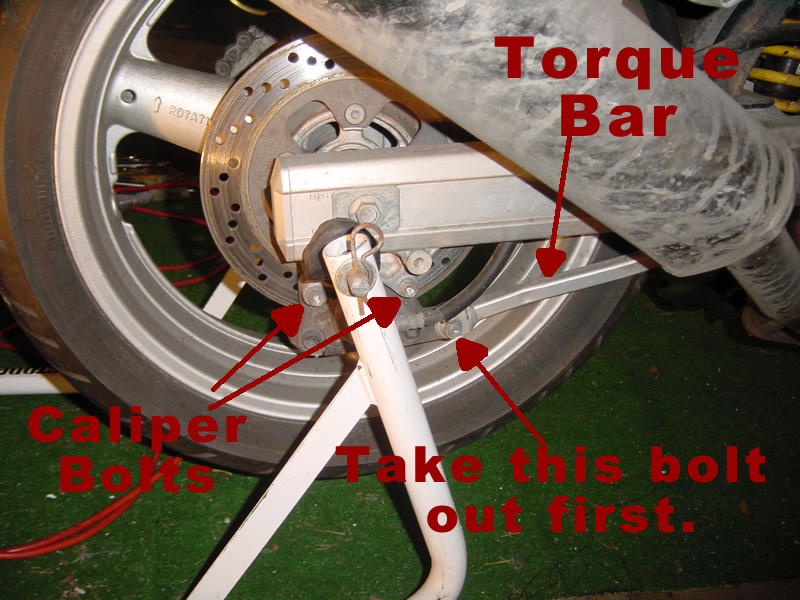
7. Next take the bolt out of the caliper, 12mm.
8. Slide the caliper off. Use the coat hanger to hand the caliper if you need to, not damaging the break line hose.
9. Take the plastic cover off. You might need a flat head screw driver to pop it off. (#8 on the parts list)
10. Look REALLY CAREFULLY. REMEMBER HOW EVERYTHING IS PUT TOGETHER, BECAUSE YOU HAVE TO PUT THEM BACK TOGETHER! If you need to, take some pictures.
11. Take the out holder pins that holding the break pad pins. I used needle nose for this. (#7 on the parts list)
12. Take the break pad pins out. I used a needle nose to get them out. (#6 on the parts list)
13. Shims, pads, springs, all should now come out.
14. Spray the caliper and shims with the cleaner.
15. Put the old pad back in and with a screw driver, rock it back and force to push the break pistons back all the way. Pay attention to the rear break reservoir. The break fluid will more than likely overflow. Once the pistons are all the way back, take the old pads out.
16. With the sand paper, clean up the grimes built up on the break pad pins. This will make the procedure, much easier.
17. Put the shims and pads together and slide them into the caliper.
18. Slide one pin in. Line up the holder pin hole so that you can put the holder pin in later.
19. Place the springs but hooking the one end under the pin you just put in.
20. Now the most difficult part. With a small flat head screw driver and the other break pad pin in your hand, hold the unhooked end of the spring down with the screw driver and put the pin through the hole. Making sure that spring get placed under the pin to create tension to hold the pads in. Do this one spring at the time.
21. Place the holder pins.
22. Spray the caliper and pads really good with the cleaner. You don’t want any hand grease left on the pads.
23. Beverage break!
24. Now all you have to do is to reverse the steps and put them all back together.
25. For the bolts to hold the calipers and the torque bar, put thread lock on it. You don’t want them coming lose on the highway!
That's it! For more pictures, go to my Flickr SV650S album.
Oh, and why am I changing the oil and filter at 9925?
Well, the guy I bought the bike from said that the bike was on the schedule, but I just didn't feel safe........ Now I know I am good for another 3000 miles or so.
Comments